Case one: If there has AP mode option on the web management page of WAVLINK router. Please follow the instructions below step by step
Hardware connections:
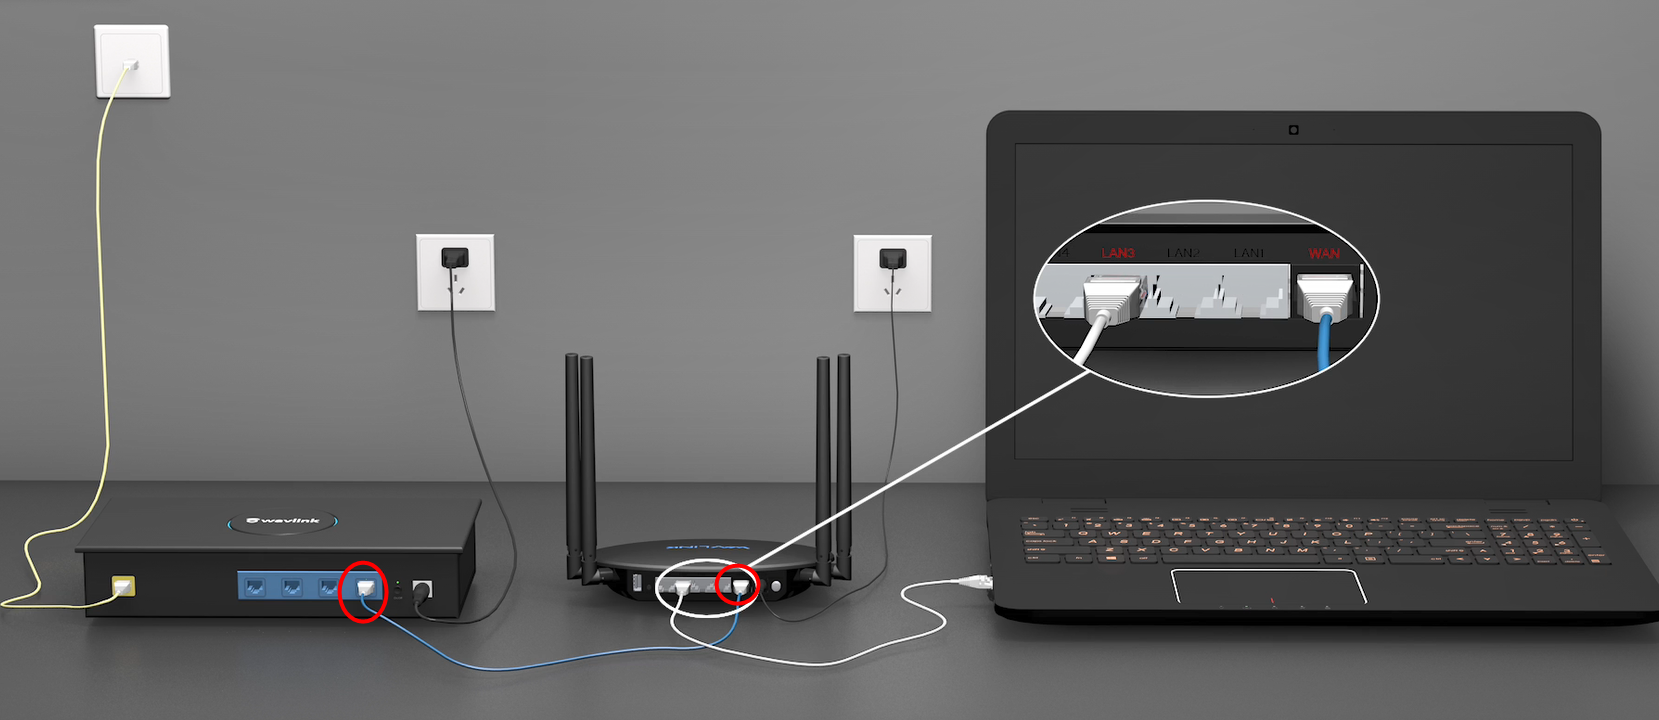
1. Connect the WAVLINK router’s WAN port to the LAN port of your primary router/modem via an Ethernet cable
2. Plug the power adapter to a socket.
3. Power on the WAVLINK router
4. Connect to your WAVLINK router via its Wi-Fi or Ethernet cable.
Setup Steps:
1. Connect your WAVLINK router via its
Wi-Fi signal “WAVLINK-XXXX” or an Ethernet cable.
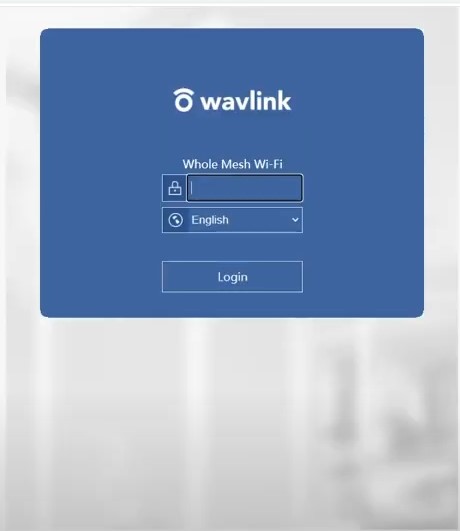
2. Launch Chrome and enter the default login URL http://192.168.10.1 or http://wavlogin.link in the URL bar not search bar.
3. Enter the login password you have set and click “Login”. The
original login password is “admin” by default if it has not been
changed.
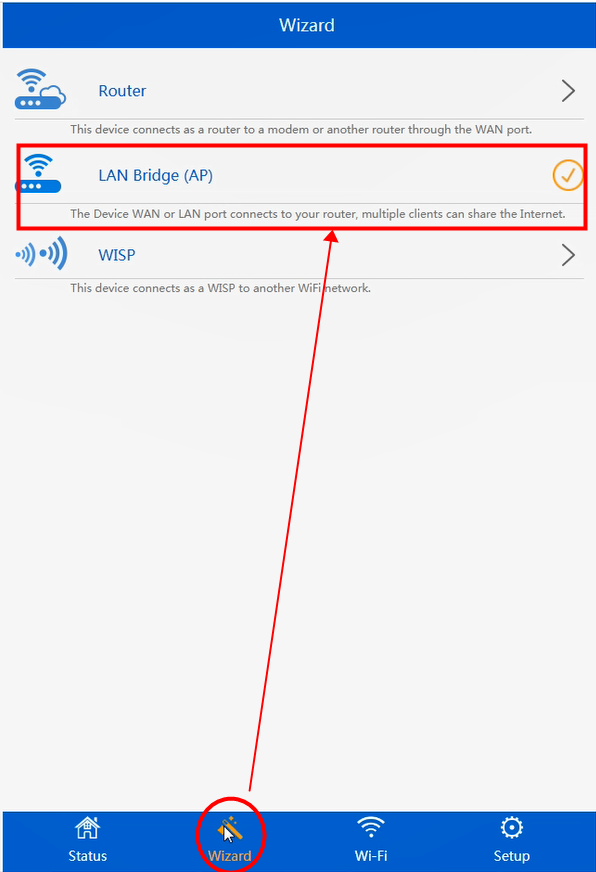
4. Click “Wizard” and choose “LAN Bridge (AP)”
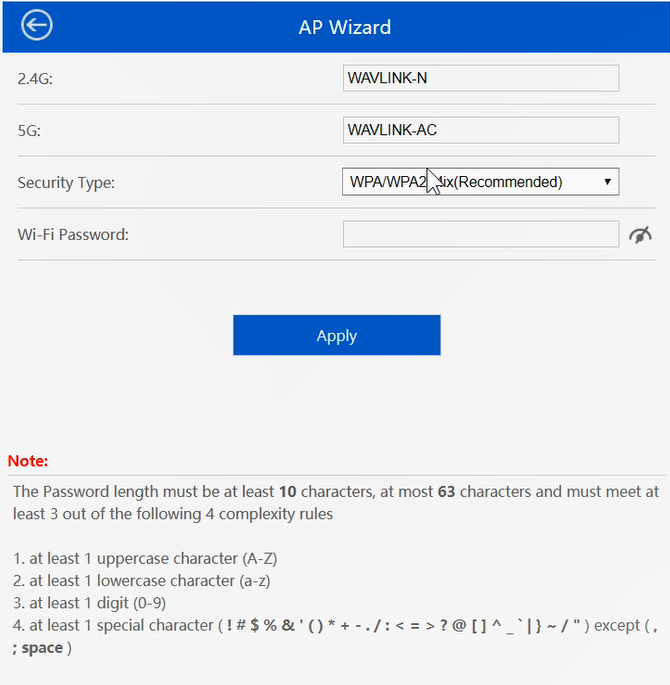
5. Set specified Wi-Fi SSID and password , click “Apply”
6. After configuration, Please reconnect the Wi-Fi SSID you set.
Case two: If there is no AP mode option with your WAVLINK router, here are the instructions for you.
In this case it requires change the LAN IP of your WAVLINK router to an IP address on the same network segment of the main router. This IP address should be outside the main router’s DHCP range.
For example, if the LAN IP of your main router is 192.168.19.1, the DHCP range is 192.168.19.100-192.168. 200 .
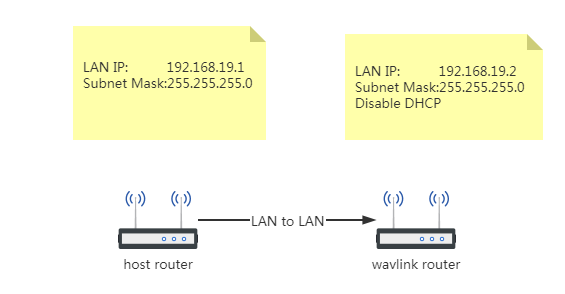
Then you can set the LAN IP address of your WAVLINK router to 192.168.19.2, the same segment but not in the range of 192.168.19.100-192.168.19.200.
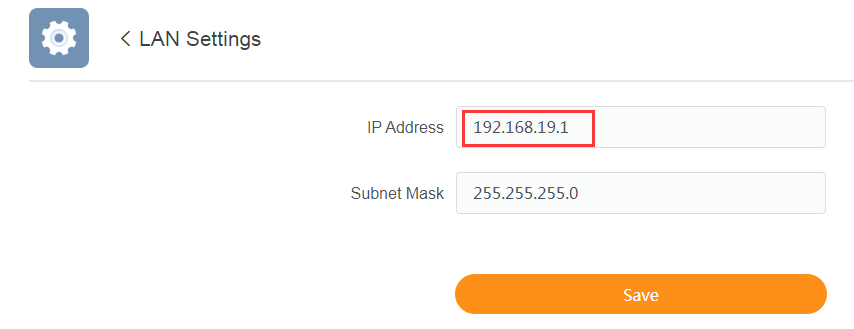
1. Log into the web management page of your main router to confirm the LAN IP and DHCP range of the main router. Assume that the LAN IP address of the main router is 192.168.19.1, and DHCP range 192.168.19.100-192.168.19.200 as the image below shows
2. Log into the web-based management page of the WAVLINK router.
3. Go to LAN setup to change the LAN IP of your WAVLINK router to 192.168.19.2 ,make sure the segment of your WAVLINK is same as the main router’s .
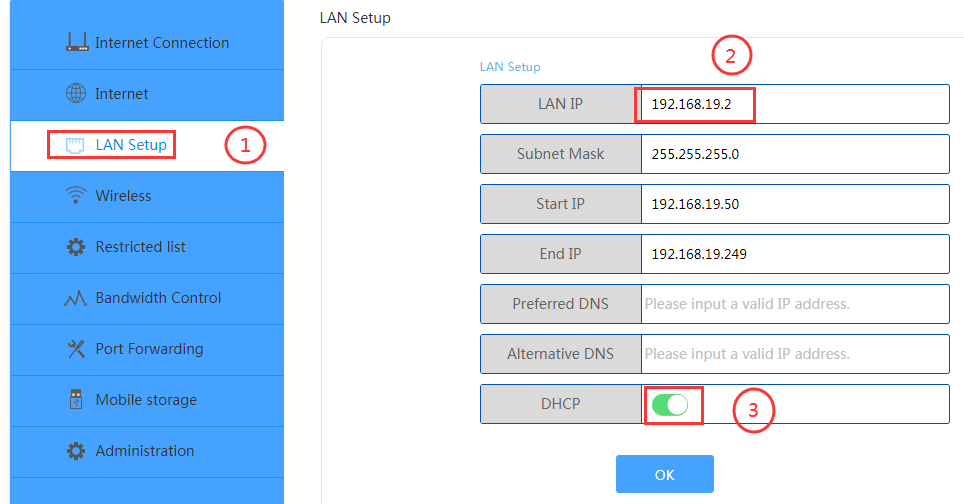
Then disable the “DHCP” server of your WAVLINK router as below image shows.
4. Connect the WAVLINK router to your main router from LAN port to LAN port via an Ethernet cable.
NOTE: After change the LAN IP of the WAVLINK router, you will need to log in to the WAVLINK router with the new IP address 192.168.19.2 you set
Get the Scoop First
Subscribe to our official website to receive exclusive first-hand news and stay up-to-date on our new product releases and promotions!