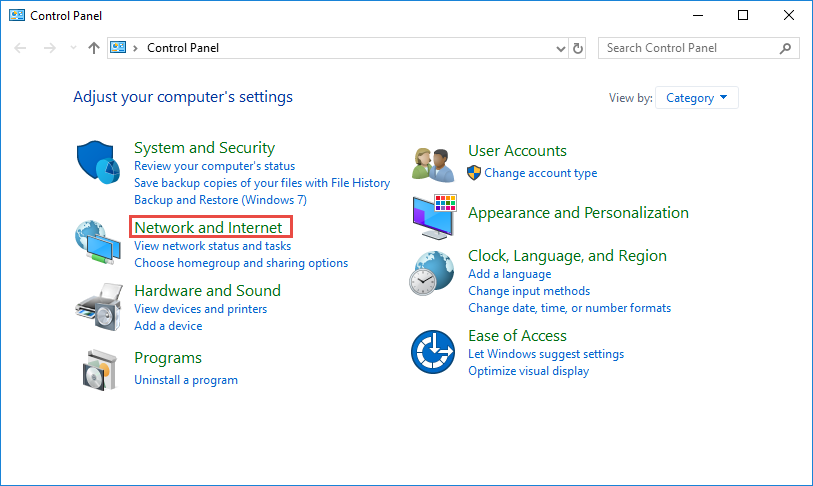
Step 1: Open the Control Panel
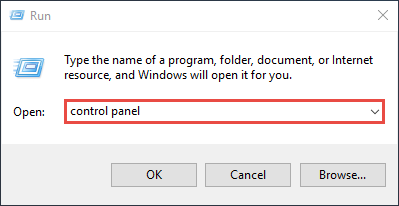
Press “Windows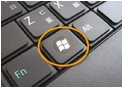 + R”, then a Run box
comes out. Input control panel and press Enter to
open the control panel.
+ R”, then a Run box
comes out. Input control panel and press Enter to
open the control panel.
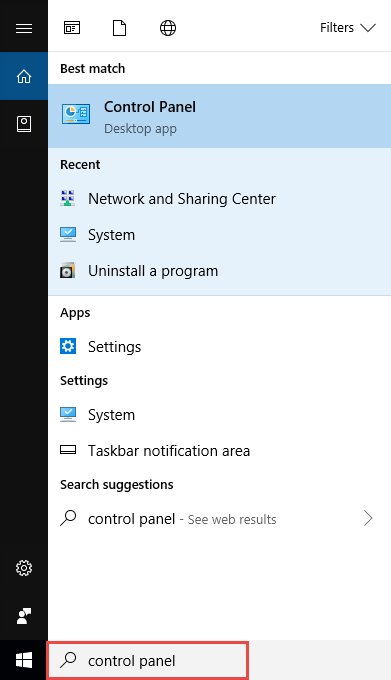
You can also type control panel in the
search bar at the lower left of the screen and press Enter to open the control
panel.
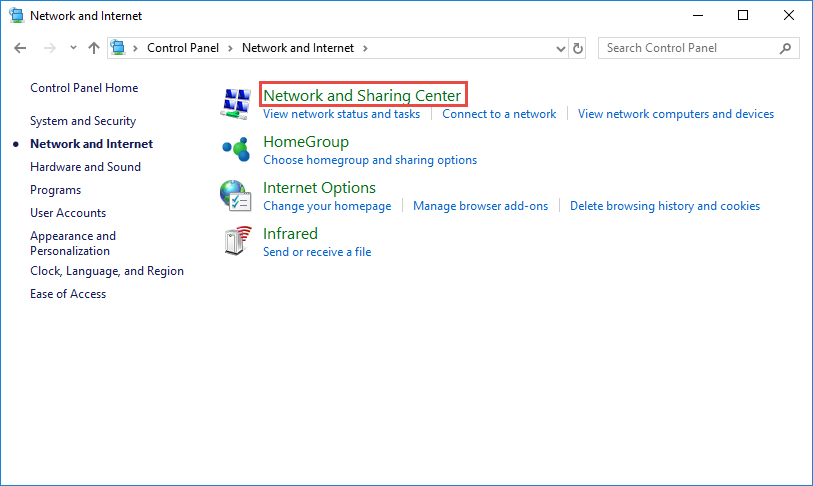
Step 2: Go to Network
Connections
Go to Network and Internet > Network and Sharing Center.
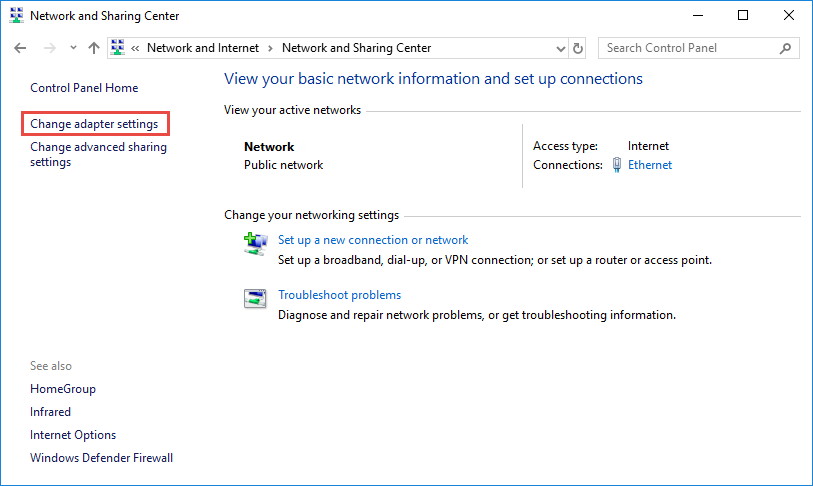
Select Change adapter settings on the left.
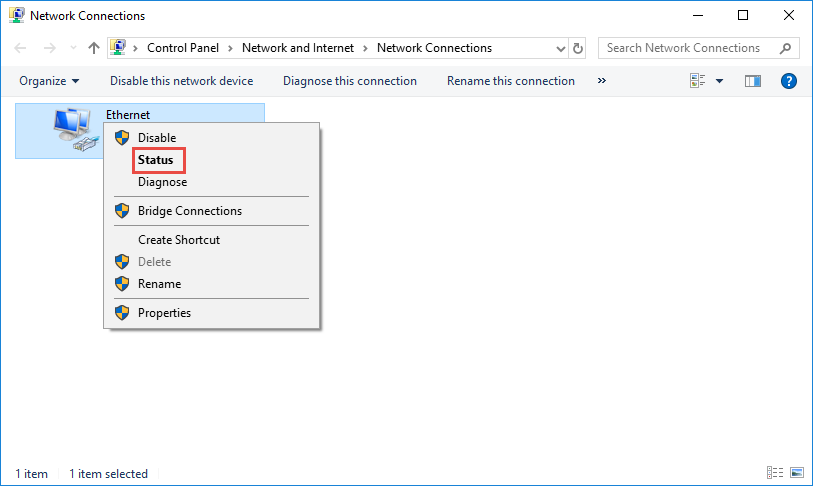
Step 3:
Find the IP address
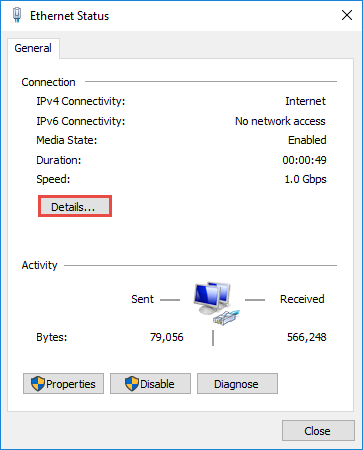
Right click the Ethernet icon and
select Status from
the context menu.
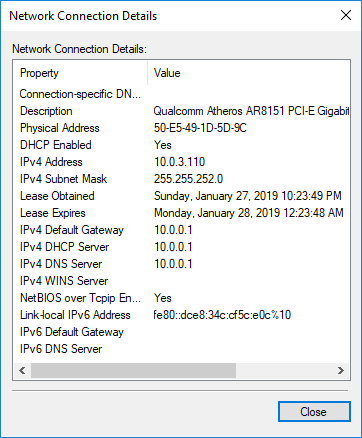
Then click Details... to view all
detailed information of network connection.
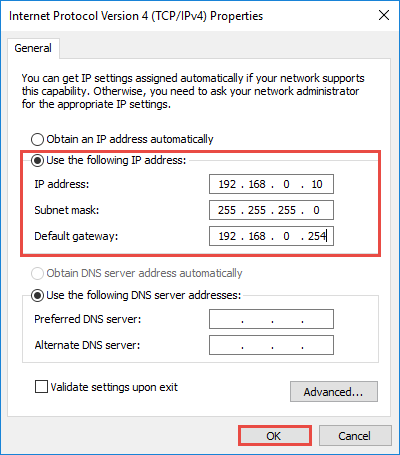
Step 4: Set
the IP address
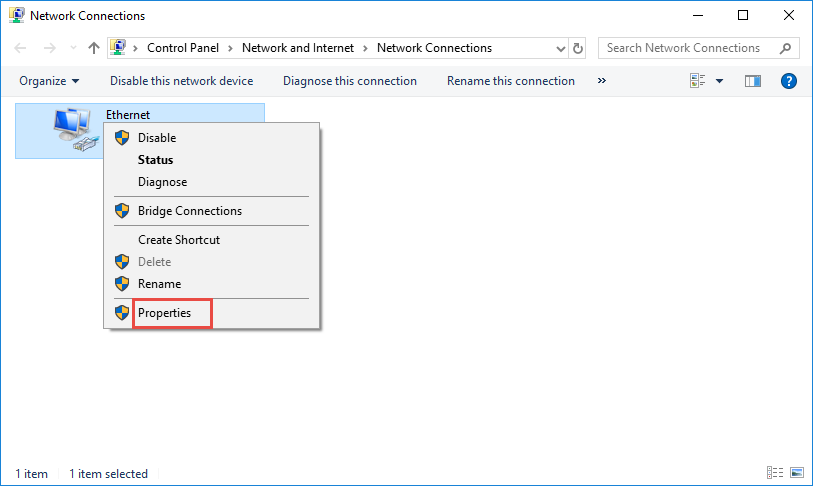
Right Click Local Area Connection and
select Properties.
Then double click Internet Protocol Version 4 (TCP/IPv4).
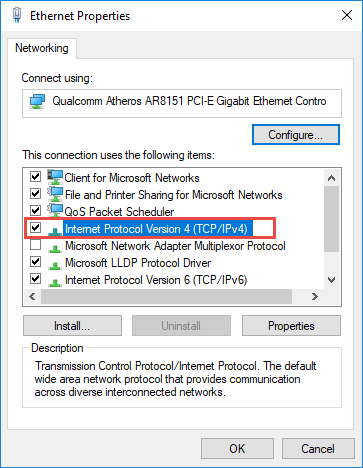
Select Use the Following IP address: and
type in the IP address, Subnet mask and Default gateway. Click OK to apply the
settings.
Note: If you need to
set a static DNS server, select Use the following DNS server address: and input the
address of DNS server. By default, the computer obtains the address
automatically.
Get the Scoop First
Subscribe to our official website to receive exclusive first-hand news and stay up-to-date on our new product releases and promotions!